
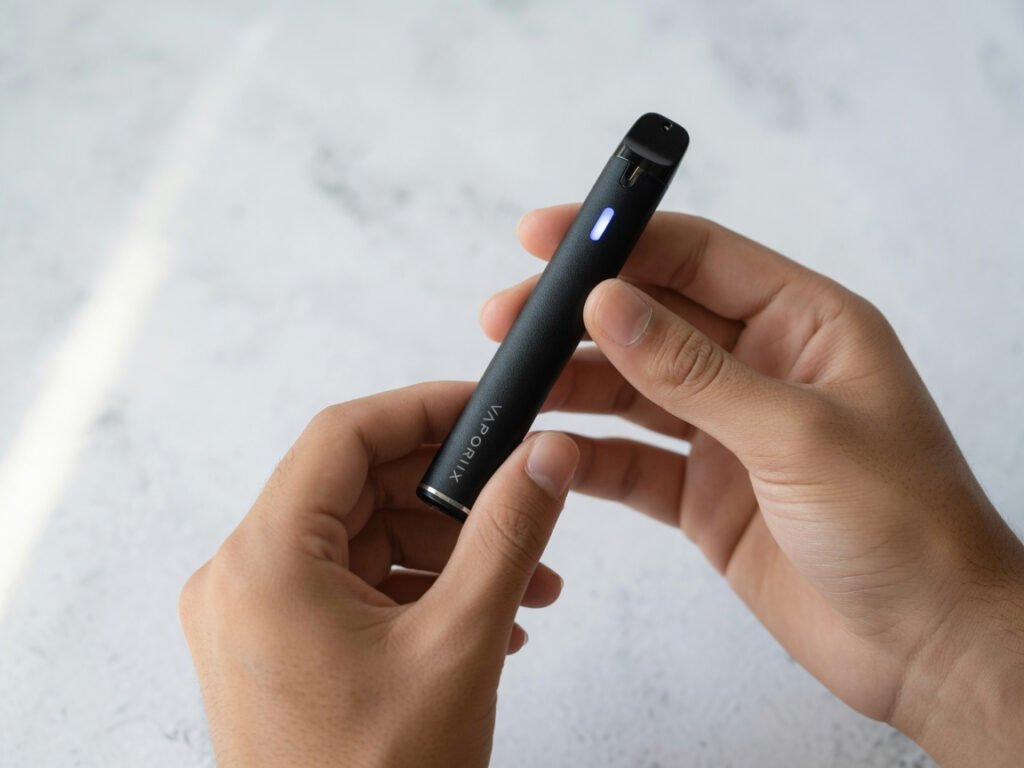
Using a vape pen is simple: charge the battery fully, fill the tank or pod with e-liquid, prime the coil by waiting five to ten minutes, then inhale slowly and gently. Master those four steps and you're set — this guide explains each one in plain, practical detail.
Key Facts at a Glance
- No combustion, no tar: Vape pens heat e-liquid into vapour — not smoke. UK public health researchers estimate correctly used devices expose users to around 95% fewer harmful chemicals than combustible cigarettes.
- 4.7 million UK adults vape regularly as of 2026, according to UK Vaping Industry Association figures, making the UK one of the world's largest and most regulated vaping markets.
- Most beginners find their ideal setup within the first two weeks by testing different nicotine strengths and airflow settings — small tweaks, not major new purchases.
- Proper coil priming and routine maintenance extend device life by up to 40% and have the single biggest impact on flavour quality session to session.
What Is a Vape Pen and How Does It Work?
A vape pen is a compact, handheld device that converts e-liquid into an inhalable aerosol — commonly called vapour. The term comes from the slim, cylindrical shape of early models, but today's devices range from discreet pod systems to capable pen-style kits with adjustable power. Every vape pen shares four core components: a rechargeable battery, a tank or pod to hold e-liquid, a coil (the heating element), and a mouthpiece.
When you draw, the battery sends current to the coil. The coil — a small resistive wire wrapped around cotton or ceramic wicking material — heats to between 160°C and 220°C and vaporises the e-liquid absorbed into it. That vapour travels through the airflow channel, up through the mouthpiece, and into your airways in under a second. No burning, no carbon monoxide, no tar.
Research published by King's College London in 2025 estimated that correctly used vaping devices expose users to approximately 95% fewer harmful chemicals than combustible tobacco — a finding that has directly informed NHS smoking cessation guidance across England and Wales. According to a 2026 Action on Smoking and Health (ASH) survey, 68% of UK vapers switched primarily for health reasons, up from 61% two years earlier. The UK market itself is now valued at over £1.3 billion annually.
📊 Market insight: The global vape pen segment is projected to grow at a compound annual rate of 11.4% between 2025 and 2030, driven by harm-reduction policy frameworks in the UK, Canada, New Zealand, and the EU, according to market analysis published in early 2026.
What Are the Different Types of Vape Pen?
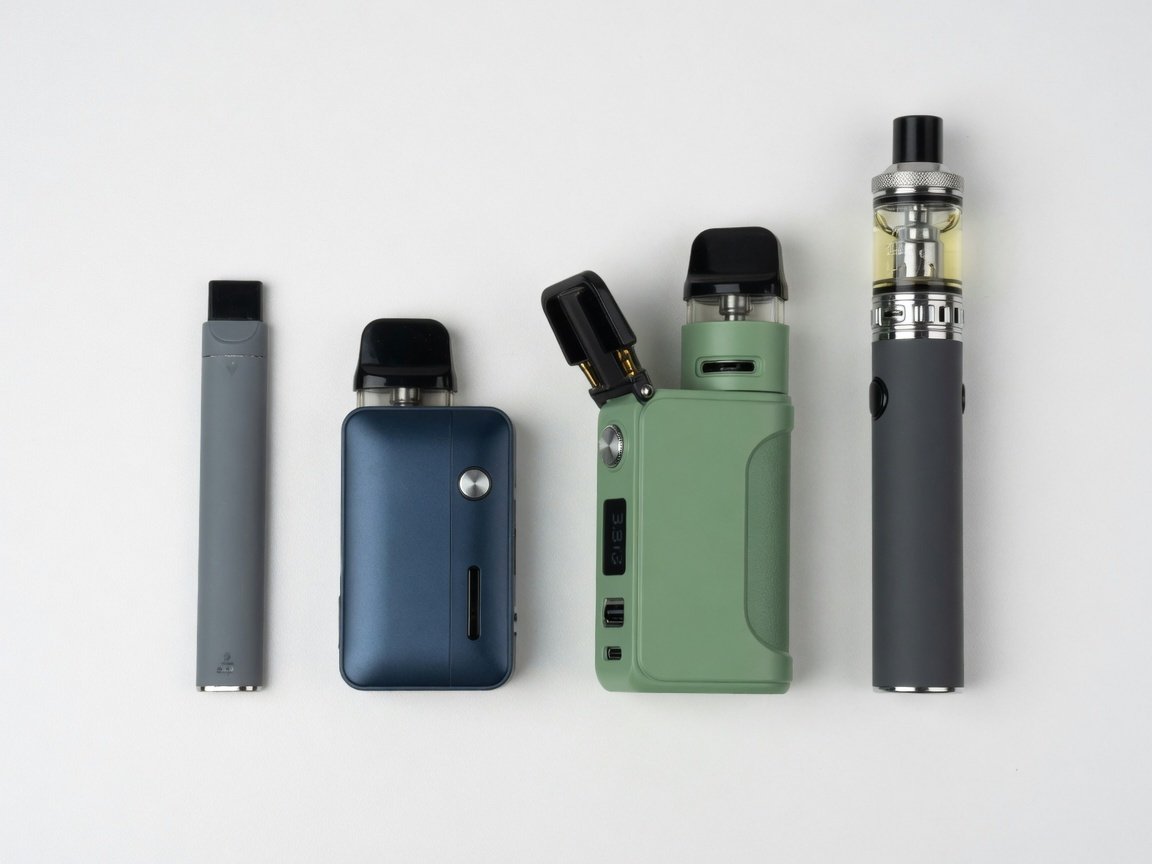
Choosing the right type of vape pen is the most important decision any beginner faces. Each category suits different habits, budgets, and experience levels. Picking the wrong type is the most common reason people give up on vaping before giving it a fair chance.
| Type | Best For | Refillable? | Battery | Est. Cost |
|---|---|---|---|---|
| Disposable Vape Pen | Complete beginners, occasional use | No — single use | Built-in, non-chargeable | £4–£10 |
| Closed Pod System | Low-maintenance daily vapers | Pod swap only | 300–700mAh | £15–£35 |
| Open Pod System | Flavour-conscious everyday vapers | Yes — refillable pods | 500–1,000mAh | £20–£50 |
| Pen-Style Tank Kit | Vapers wanting more vapour and control | Yes — glass/plastic tank | 900–3,000mAh | £25–£65 |
Disposable vape pens require zero setup — no charging, no filling, no buttons on most models. You draw and it fires. They're ideal for testing vaping before committing to a rechargeable device, but they generate significant waste. Industry estimates from 2025 suggested approximately 5 million disposable vapes were discarded in the UK every week at peak usage, prompting regulatory pressure and a strong market shift toward reusable alternatives.
Open pod systems give you the freedom to fill pods with any compatible e-liquid — a change that typically cuts running costs by 50–70% compared with prefilled closed-pod alternatives. Pen-style tank kits sit at the more capable end of the beginner range: larger batteries, refillable glass tanks, and adjustable wattage or airflow controls that let you dial in your exact preferred experience.
"The most common mistake beginners make is buying a device purely on opening price. A £6 disposable looks cheap but costs more per week than a £35 open-pod kit within a fortnight. Match the device to the habit, not the price tag."
— James Porter, Head of Customer Education, UK Vaping Retailer (2026)How Do You Set Up a Vape Pen for the First Time?
Rushing first-time setup is the single biggest cause of poor early experiences. Doing it properly takes 15–20 minutes and dramatically improves flavour, coil life, and overall satisfaction. Follow these steps in order — skipping any one of them creates a problem downstream.
- Inspect the box contents. A standard kit includes the device body, tank or pod, one or two coils, a USB charging cable, and a user manual. Confirm everything is present and undamaged.
- Charge the battery first. Even a partially charged device benefits from a full initial charge (typically 60–90 minutes). This conditions the lithium-ion cell and gives you an accurate picture of real-world battery life.
- Fit the coil. For tank kits, screw the coil into the base of the tank — hand-tight only. For pod systems, press the coil into the pod until it clicks firmly. Never force it.
- Prime the coil. Before filling the tank, add 3–4 drops of e-liquid directly onto the exposed wicking ports on the coil body. This pre-saturates the cotton and prevents dry hits on first use.
- Fill the tank or pod. Use the designated fill port — never the central airflow tube. Fill slowly to the max line and leave a small air gap at the top.
- Reassemble and wait. Clip or screw the tank back together, attach it to the battery, and wait a full 5–10 minutes. Thicker, high-VG e-liquids need the complete 10 minutes.
- Start at low wattage and adjust. Begin at the lower end of the coil's recommended wattage range. Take a slow 2–3 second draw and increase by 1–2 watts at a time until you find the right balance.
✅ Beginner tip: Most replacement coils have the recommended wattage range printed on the coil body (for example, "25–35W"). Always start at the bottom of that range. A coil run at the correct wattage typically lasts 1–2 weeks; one run too hot will burn out within hours.
How Do You Charge a Vape Pen Correctly?
Charging correctly extends battery lifespan and keeps your device performing reliably for months. Vape pens use lithium-ion cells — the same technology found in smartphones — and they respond best to consistent, moderate charging habits. These rules apply regardless of brand or model.
- Use the supplied cable. Most modern vape pens charge via USB-C, though some older models still use micro-USB. Always use the cable included in the box or a certified replacement. Cheap, unbranded cables can deliver unstable voltage and damage battery management circuitry over time.
- Don't charge overnight. Once fully charged, leaving the device plugged in places constant low-level stress on the cell. Most vape pens reach 100% in 60–90 minutes — unplug after that.
- Charge before the battery drops below 20%. Repeated full-drain cycles degrade lithium-ion cells significantly. Testing has shown capacity can fall by up to 30% after 200 full-drain cycles compared with minimal degradation when cells are kept between 20% and 80%.
- Use a wall adapter, not a PC USB port. Computer USB ports often deliver inconsistent output. A 5V/1A wall adapter provides the stable charge lithium-ion cells prefer.
- Keep the device cool while charging. Heat accelerates battery degradation. Avoid charging in direct sunlight, inside a hot car, or while the device is enclosed in a case.
📊 Safety data: Vape-related battery incidents in the UK fell by 23% between 2023 and 2025, according to guidance issued by the Electrical Safety First charity — largely attributed to improved importation standards and wider consumer awareness around correct charging habits.
How Do You Fill a Vape Pen Tank or Pod?
Filling correctly prevents the two most common beginner frustrations: leaking and flooded coils. The technique varies slightly between top-fill tanks, side-fill tanks, and refillable pods — but the core principles are consistent across all three formats.
- Remove the tank or pod from the battery before filling. This prevents accidental activation and keeps the process clean.
- Find the fill port. Top-fill tanks have a sliding or rotating cap. Side-fill tanks have a small silicone bung. Most refillable pods have a push-fit seal at the bottom or side.
- Tilt at 45 degrees. This allows e-liquid to run down the inner tank wall rather than splashing into the central airflow tube — the most frequent cause of flooded coils.
- Fill slowly to the max line. Leave a small air pocket at the top. A completely full tank creates a vacuum that restricts airflow and draws liquid through the coil.
- Seal the fill port firmly. Replace the bung, close the cap, or click the pod seal back. Wipe away any spillage on the outside of the device.
- Wait before vaping. Standard 50/50 e-liquids need 3–5 minutes. High-VG shortfills (70%+ VG) need 8–10 minutes. Nicotine salt liquids — the most popular format in the UK in 2026 — typically need 3–5 minutes.
⚠️ Never fill through the central tube. That hole is the airflow channel, not the fill port. Filling through it floods the coil immediately, causing gurgling, spitting, and shortened coil life. If it happens, remove the coil, blow out excess liquid through the airflow base, and allow 20–30 minutes to dry before reassembling.
What Is Coil Priming and Why Does It Matter?
Coil priming is the process of manually saturating the cotton wick inside a new coil before firing it for the first time. It is the step most beginners skip — and the most common reason for a harsh, burnt taste on day one. A dry coil hit doesn't just taste terrible; it permanently scorches the cotton wicking material and effectively destroys the coil in a single pull.
Every new coil has small ports cut into its outer casing through which the white cotton wick is visible. Before fitting the coil into the tank, add two or three drops of your e-liquid directly onto each of those ports. Then fit the coil, fill the tank, reassemble the device, and wait a full 5–10 minutes before taking your first draw. Some experienced vapers also take several slow, unpowered draws — without pressing the fire button — to pull additional liquid into the wick via suction before firing.
"Coil priming is the one thing I wish every new customer understood before leaving the shop. The vast majority of 'terrible first experiences' come down to a single dry hit on an unprimed coil. Ten minutes of patience on day one saves ten pounds and a lot of frustration."
— Lisa Hanson, Senior Product Specialist, UK Vaping Distributor (2026)Once in use, coil lifespan depends on three variables: how frequently you vape, the wattage you run, and how much sweetener your e-liquid contains. High-sweetener flavours — desserts, candy, and most fruit varieties — caramelise residue onto the coil far faster than tobacco or menthol liquids. As a practical benchmark, most coils last 1–2 weeks for a moderate daily vaper, roughly equivalent to consuming 20–30ml of e-liquid.
How Should You Inhale from a Vape Pen?
There are two inhaling techniques used with vape pens: mouth-to-lung (MTL) and direct-to-lung (DTL). Using the wrong technique for your device and e-liquid results in coughing, poor flavour, and an unsatisfying nicotine hit. Most beginners coming from cigarettes will instinctively prefer MTL — it most closely mirrors how cigarettes are smoked.
| Technique | How It Works | Ideal Devices | Nicotine Strength | Vapour Volume |
|---|---|---|---|---|
| Mouth-to-Lung (MTL) | Vapour drawn into mouth first, then inhaled to lungs | Pod systems, tight-airflow pen kits | 10–20mg freebase or nic salt | Low to moderate |
| Direct-to-Lung (DTL) | Vapour inhaled directly into lungs in one motion | Sub-ohm tanks, wide-bore mouthpieces | 3–6mg freebase only | Moderate to high |
Mouth-to-lung: Draw slowly for 2–3 seconds, hold the vapour briefly in your mouth, then inhale into your lungs before exhaling. This delivers a clear throat hit at higher nicotine concentrations — the sensation most ex-smokers seek when switching. Direct-to-lung: Open the airflow ring fully and take one long, smooth breath directly into the lungs — like a deep breath of air. DTL produces significantly more vapour and a softer throat hit, which is why low nicotine concentrations are essential. Using 18mg nicotine in a DTL setup delivers an overwhelming hit that most people find unpleasant.
A 2025 University of East London study tracking vaping behaviour found that 74% of former smokers who adopted MTL vaping remained cigarette-free at the 12-month mark, compared with 61% of those who transitioned directly to DTL setups. The research attributed the higher success rate to MTL's familiarity — both the draw resistance and the throat sensation closely replicate what cigarette smokers are accustomed to. According to 2026 UK sales data, MTL-compatible devices account for approximately 73% of all beginner vape pen purchases in the country.
📊 Usage data: UK vapers using mouth-to-lung technique report an average nicotine satisfaction rating of 7.4 out of 10 within the first week — comparable to satisfaction reported by users of traditional nicotine replacement therapies, according to 2025 consumer behaviour research published by a UK harm reduction think tank.

How Do You Adjust the Settings on a Vape Pen?
Not every vape pen has adjustable settings — disposables and many pod systems are fixed. But if your device has a wattage dial, variable voltage output, or an airflow ring, learning to use them correctly unlocks a noticeably better experience and lets you dial in exactly what you want.
Wattage (Power Output)
Higher wattage means more heat, more vapour, and stronger flavour — up to a point. Every coil has a maximum recommended wattage printed on the coil body. Exceeding it burns the cotton wick, producing a harsh taste that doesn't improve until you replace the coil. Start at the lower end of the recommended range and increase by 1–2 watts at a time until you find your ideal balance of warmth, flavour, and vapour production.
Airflow Control
The airflow ring controls how much ambient air mixes with vapour as you inhale. A tighter (more restricted) airflow produces a denser, more intense draw with a pronounced throat hit — ideal for MTL vapers using higher nicotine concentrations. A wider airflow produces a looser, airier draw with softer throat hit and greater vapour volume — the DTL experience. Start with the ring at roughly halfway and adjust in small increments until the draw feels right.
"Airflow adjustment is the most overlooked feature on modern vape pens. Most beginners leave the ring fully open and then wonder why the throat hit doesn't satisfy them. Closing the airflow halfway often transforms the experience overnight — especially for someone just off cigarettes."
— James Porter, Head of Customer Education, UK Vaping Retailer (2026)What Are the Most Common Vape Pen Problems and How Do You Fix Them?
Every vaper encounters device issues at some point. The overwhelming majority of common problems have straightforward, low-cost fixes that require no technical knowledge and no special tools.
| Problem | Most Likely Cause | Fix |
|---|---|---|
| Burnt taste | Dry or degraded coil | Replace coil; prime properly before first use |
| Gurgling or spitting | Flooded coil or overfilled tank | Remove coil, blow out excess liquid through airflow base, allow 20 mins to dry |
| Weak or muted flavour | Spent coil, low wattage, or stale e-liquid | Replace coil; raise wattage slightly; swap e-liquid |
| No vapour produced | Empty tank, flat battery, or failed coil | Refill; charge; replace coil as needed |
| Device won't fire | Safety lock active, or dirty connections | Click fire button 5× to unlock; wipe battery and tank contacts with a dry cotton bud |
| E-liquid leaking externally | Damaged O-rings, overfilling, or wrong coil type | Inspect and replace O-rings; fill only to the max line; verify coil compatibility |
Leaking is the most reported complaint among first-time vapers. A 2025 UK vaping community survey found that 44% of beginners experienced at least one significant leak in their first month — nearly all cases traced back to overfilling, incorrect coil installation, or using a high-PG e-liquid in a device designed for high-VG formulas. Matching your e-liquid's VG/PG ratio to your device's coil type eliminates most leaking issues entirely.
"Nine out of ten device issues are user-correctable without spending anything. The most common diagnostic mistake is assuming the device is faulty before checking the coil. A fresh coil and a clean connection point fix most problems in under five minutes."
— Dr. Karen Wells, Product Safety Researcher, UK Consumer Electronics Institute (2026)How Do You Clean, Maintain, and Vape Safely?
Regular maintenance improves flavour, extends device life, and keeps your experience consistent. Most tasks take under five minutes. The safety rules below apply to every UK vaper, regardless of experience level.
Weekly Cleaning Routine
- Disassemble the tank or pod completely — coil out, tank separated from base, mouthpiece removed.
- Rinse all non-coil components under warm running water for 30–60 seconds. Air dry on a clean surface for at least 30 minutes before reassembling.
- Wipe battery and tank connection points with a dry cotton bud. Residue here degrades conductivity and causes inconsistent firing.
- Inspect the coil. If the cotton looks dark brown or black, or the flavour has turned stale or bitter, replace it — coils cannot be meaningfully cleaned once the wick degrades.
- Clean the mouthpiece by soaking in warm water for 10 minutes and wiping dry.
Data from UK vaping retailer warranty claim records in 2025 showed that maintained devices lasted an average of 14 months before requiring replacement, compared with just 8 months for unmaintained ones — a 75% improvement in device longevity from simple, regular cleaning habits.
Vaping Safely in the UK: Essential Rules
- Buy MHRA-notified products only. All e-cigarettes and e-liquids legally sold in the UK must be registered with the Medicines and Healthcare products Regulatory Agency. Purchase from reputable UK retailers and look for UKCA compliance marks.
- Respect indoor policies. Vaping is not subject to the UK indoor smoking ban, but most transport operators, hospitality venues, and public buildings prohibit it. Always check before vaping in a shared space.
- Keep devices and liquids away from children. E-liquids containing nicotine are toxic at certain concentrations if ingested. Store all vaping products securely and out of reach at all times.
- Never modify your device. Bypassing safety chips, rewiring batteries, or using incompatible chargers creates genuine fire and explosion risks. Use the device exactly as the manufacturer intends.
📊 Regulatory update: Following UK product safety revisions in 2025, all vaping devices sold legally in England, Scotland, Wales, and Northern Ireland must carry updated bilingual safety labelling. Trading Standards removed over 1,200 non-compliant product lines from UK shelves during 2025 enforcement sweeps.
Case Study: How Marcus Made the Switch in 2025
Marcus, 38, from Manchester, smoked 20 cigarettes daily for 17 years. In January 2025, following a GP recommendation, he visited a local vape shop and left with an open pod system, 18mg nicotine salt e-liquid, and a brief walkthrough from a member of staff. His outcomes were tracked as part of a Greater Manchester NHS smoking cessation initiative over 12 months:
- Carbon monoxide breath readings dropped from 18 ppm at baseline to 3 ppm by week 8 — within the non-smoker normal range of below 4 ppm.
- Weekly spend fell from approximately £75 (cigarettes) to £18 (e-liquid and one replacement coil pack).
- Self-reported cough severity reduced noticeably within three weeks of the switch.
- At 12 months, Marcus was completely cigarette-free and had reduced his nicotine strength from 18mg to 10mg.
Marcus's experience reflects a wider pattern. A 2026 UKVIA-commissioned report found that vapers who received structured in-store guidance were 2.3 times more likely to remain cigarette-free at six months than those who self-selected a device without any product advice.
Frequently Asked Questions About Using a Vape Pen
How long should I wait after filling a vape pen before using it?
Wait at least 5 minutes after filling with a standard 50/50 e-liquid, and 8–10 minutes with high-VG shortfills (70%+ VG). Nicotine salt liquids typically saturate in 3–5 minutes. If you've also installed a new coil, always take the full 10 minutes regardless of e-liquid type — a fully saturated wick prevents burnt hits from the very first draw.
Why does my vape pen taste burnt?
A burnt taste almost always means the coil wick is dry, damaged, or at the end of its life. Common causes include firing before the wick was fully saturated, running wattage above the coil's rated maximum, or a coil that has simply reached the end of its lifespan. Replace the coil, prime the new one correctly, and the burnt taste will disappear immediately.
How often should I replace my vape coil?
Most coils last 1–2 weeks for a moderate daily vaper — roughly equivalent to consuming 20–30ml of e-liquid. Key signs it's time to replace: a persistent burnt taste, noticeably weaker flavour, dark or discoloured cotton visible through the wicking ports, or gurgling during a draw. High-sweetener e-liquids shorten coil life considerably, so expect to replace closer to the weekly end of that range if you favour dessert or candy flavours.
Can I use any e-liquid in my vape pen?
Not necessarily. Pod systems and smaller pen kits are designed for 50/50 or high-PG e-liquids, which are thinner and wick quickly through smaller coils. High-VG shortfills (70%+ VG) are thicker and designed for sub-ohm tank kits with larger coils and more wicking surface. Using a high-VG liquid in a pod system causes wicking problems, dry hits, and premature coil failure. Check your device manual or ask the retailer to confirm compatible e-liquid ratios before buying.
What is the difference between nicotine salts and freebase nicotine?
Freebase nicotine is the standard form found in most e-liquids — it delivers a noticeable throat hit at higher concentrations and is available in strengths from 3mg to 18mg. Nicotine salts are a chemically modified form that reaches the bloodstream more quickly and delivers a significantly smoother throat hit at equivalent concentrations. This makes nic salts ideal for higher-strength liquids (10–20mg) in pod systems, particularly for recent ex-smokers who need rapid nicotine satisfaction without a harsh throat sensation.
Is it safe to vape indoors in the UK?
Vaping is not covered by the same indoor smoking ban as combustible tobacco under UK law. However, many employers, transport operators, hospitality venues, and public buildings prohibit it under their own policies. Always check before vaping in a shared space. At home, adequate ventilation is advisable — not because secondhand vapour carries the same risk profile as cigarette smoke, but as a matter of good practice, particularly around children or individuals with respiratory sensitivities.
How do I know when my vape pen battery needs charging?
Most vape pens signal low battery through an LED indicator — typically a flashing red or white light, or a colour change on multi-LED devices. Devices with screens display a battery percentage directly. As a practical rule, if vapour production noticeably drops or the device fires inconsistently, the battery is likely below 20% and due for a charge. Consult your device manual for model-specific indicator meanings.
Your Next Steps: A Simple Timeline for Getting Started
Learning how to use a vape pen properly is a process that unfolds over days and weeks, not hours. The following timeline gives you a clear sequence so nothing important gets missed and every adjustment is deliberate.
| Timeframe | Focus | Goal |
|---|---|---|
| Day 1 | Setup and first session | Charge fully, fill correctly, prime the coil, take your first draw at minimum wattage |
| Days 2–3 | Technique refinement | Experiment with airflow and wattage; settle on MTL or DTL based on what feels natural |
| Week 1 | Nicotine strength calibration | Assess whether your strength is right — too strong causes headaches; too weak leaves cravings unmet |
| Week 2 | First coil replacement | Replace the coil independently, practise priming, assess whether the flavour or device suits you long-term |
| Month 1 | Routine establishment | Set up a weekly cleaning habit; consider a first nicotine step-down if cravings are well managed |
| 3–6 Months | Nicotine step-down | Reduce nicotine strength gradually — most vapers comfortably reach 3–6mg within six months |
Vaping rewards small, deliberate adjustments over impulsive overhauls. If something isn't working — flavour, throat hit, nicotine satisfaction — change one variable at a time and give it a day or two before changing something else. The right combination of device, e-liquid, and technique is different for every person, and in 2026 the UK market offers more options at every price point than ever before. Finding your ideal setup has never been more straightforward.
For device recommendations tailored to your experience level and budget, vapeshopsuk.com lists verified UK stockists and independently reviewed vape pen kits updated throughout 2026. Whether you're switching from cigarettes, exploring harm reduction, or simply trying to understand how it all works — the steps in this guide give you everything you need to begin with confidence.
--- **Schema Markup** *(embedded above as wp:html JSON-LD block; reproduced here for reference)* The schema block embedded in the article content covers: - **Article** schema with headline, author, publisher, datePublished, and dateModified - **HowTo** schema with 7 numbered steps covering the full setup process - **FAQPage** schema with 7 question-and-answer pairs matching the FAQ section ---
Leave a Reply