
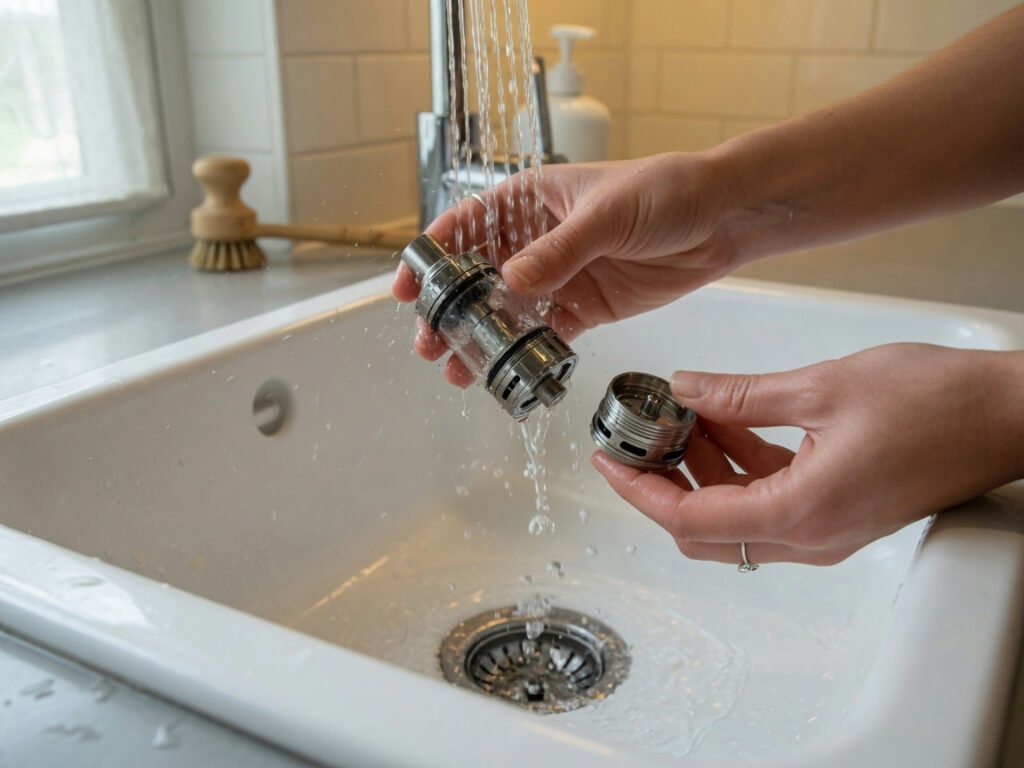
To clean a vape, disassemble the tank, rinse each part under warm running water, wipe the mod body with a damp cloth, leave everything to dry completely, then reassemble. The whole process takes around 15 minutes and can immediately transform your flavour and vapour production.
- A quick rinse takes around 15 minutes; a deep clean takes 30–45 minutes and should be done once a month.
- Industry estimates from 2025 show regular cleaning can extend coil lifespan by up to 40%, cutting replacement costs significantly.
- Different device types — tanks, pod systems, and mods — need slightly different cleaning approaches. This guide covers all of them.
- Never submerge your mod or battery section in water. Only tank components and pod shells are safe to rinse.
Why Does a Dirty Vape Taste So Bad?
If your vape tastes burnt, stale, or just off, there’s a strong chance you’re drawing through a layer of old e-liquid residue. E-liquid is a blend of vegetable glycerine, propylene glycol, flavour concentrates, and sometimes nicotine. Over time, this mixture doesn’t simply evaporate and leave nothing behind — it leaves a sticky, caramelised residue that coats the interior of your tank, your coil, and your mouthpiece.
This residue causes a cascade of problems. It blocks the wicking holes in your coil, reducing e-liquid flow. It reacts chemically with fresh e-liquid and distorts the intended flavour profile. It raises the operating temperature of your coil, accelerating burnout. According to a 2025 survey of UK vapers conducted by a leading vaping industry research group, nearly 62% of vapers who reported persistent poor flavour hadn’t cleaned their device in more than three weeks.
The mouthpiece and airflow channels compound the problem further. These are the components you put to your lips dozens of times each day, and they collect dust, condensed vapour, and debris. That condensation is essentially a cold, stale version of your e-liquid, and it degrades the quality of every single draw you take. Cleaning isn’t just about hygiene — it’s directly tied to the quality of your vaping experience from one fill to the next.
What Do You Actually Need to Clean a Vape?
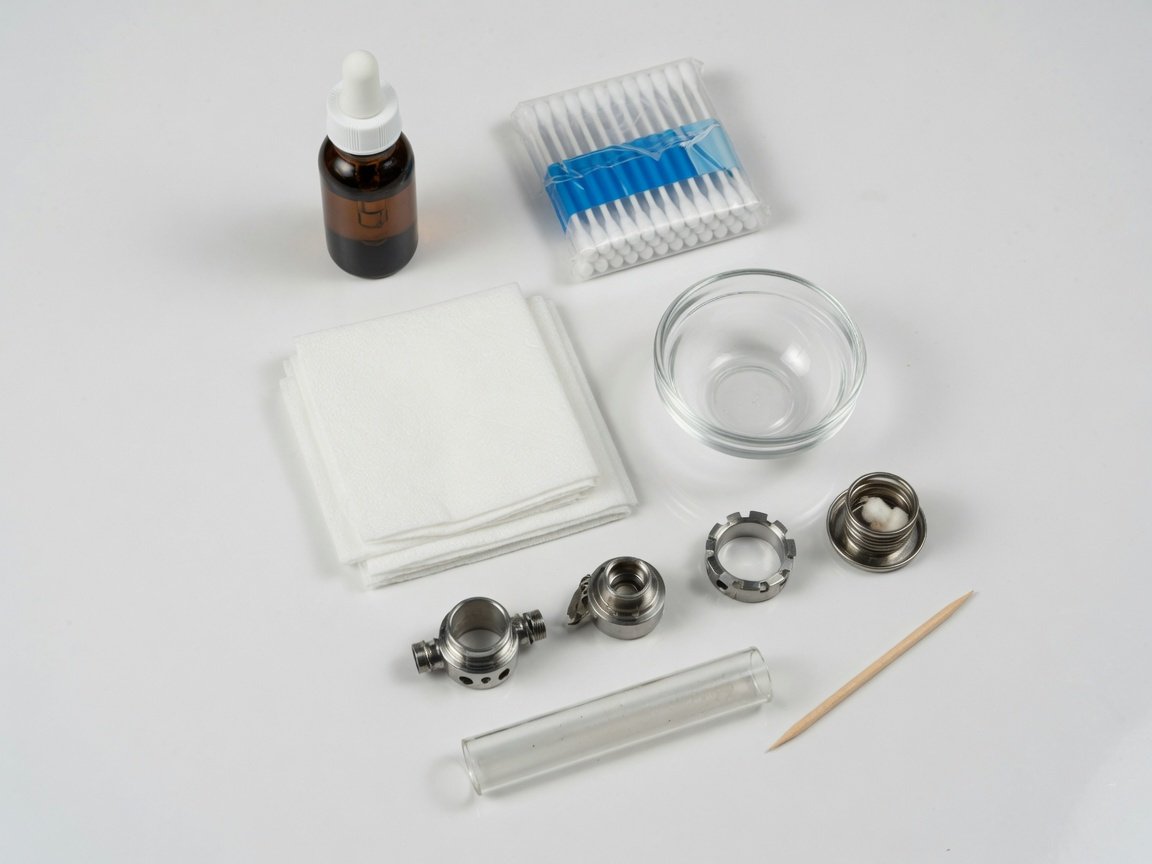
You don’t need specialist products to clean most vape devices. The basics handle the vast majority of cleaning jobs, and you probably already have most of them at home. Resist the temptation to buy expensive “vape cleaning kits” — for a standard clean, they’re rarely worth the spend.
Here’s what to have ready before you start:
- Warm running water — the most effective cleaning agent for tank components and the best starting point for any clean
- Paper towels or lint-free cloths — for pat-drying and wiping down surfaces without leaving fibres behind
- Cotton buds / cotton swabs — essential for cleaning threading, connection pins, and tight corners that water can’t reach easily
- Isopropyl alcohol (IPA, 90% or above) — for stubborn residue on glass and metal; allow full evaporation before use or reassembly
- A small bowl or container — useful for soaking components during a deep clean
- Unfragranced dish soap — a single drop helps cut through thick, caramelised residue if plain water isn’t sufficient
- A toothpick or fine tool — for carefully clearing blocked airflow slots and debris from narrow chambers
Acetone, bleach, scented cleaning sprays, or any product containing fragrance. These leave chemical residues that survive rinsing and end up being inhaled. Stick to water, IPA, or unfragranced dish soap only.
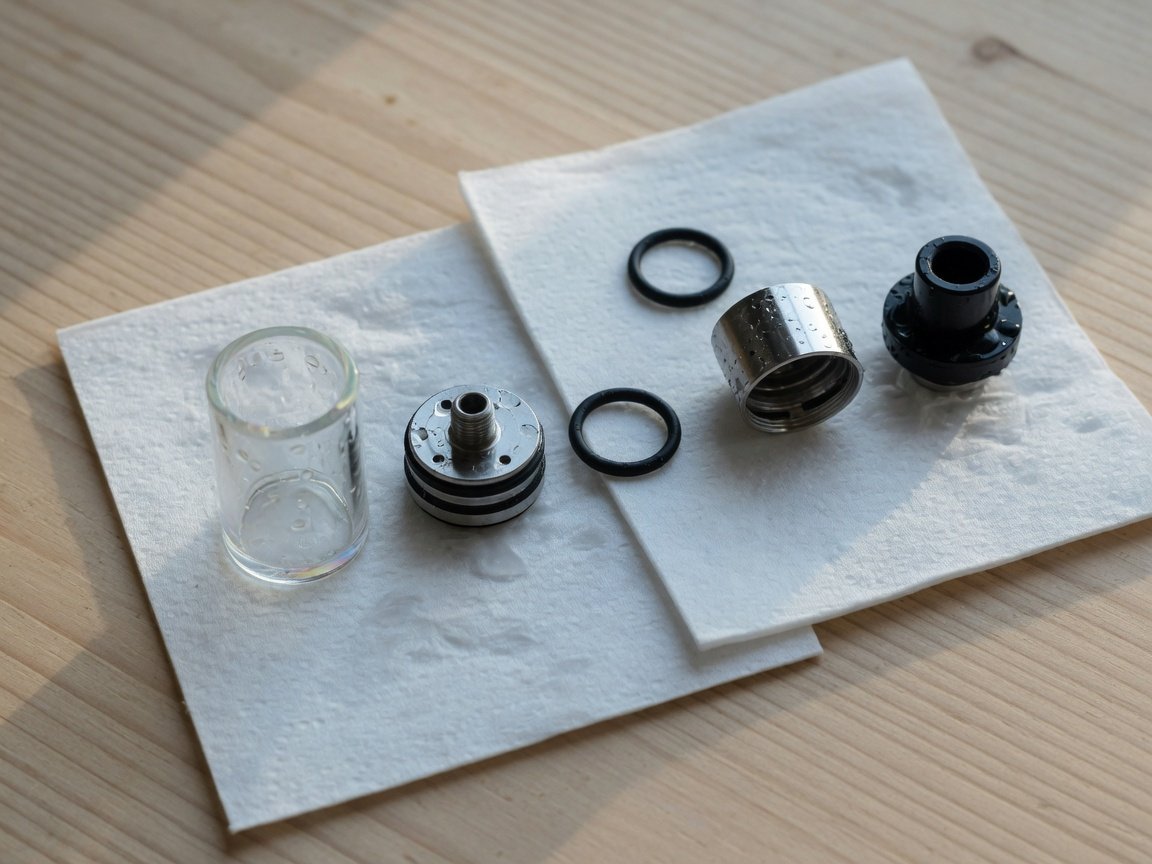
One thing many vapers overlook is proper drying time. Water remaining in the tank or coil housing will dilute your next e-liquid fill and can cause dry, crackling hits. Give all components at least one to two hours of air-drying time after a rinse — or pat dry with paper towels, then rest upright for at least 30 minutes before reassembly. Data from 2025 consumer feedback in the UK vaping sector indicates that flooding and diluted flavour — two of the most common complaints — are most often caused by insufficient drying rather than a faulty device.
How Do You Clean a Vape Tank Step by Step?
Cleaning a vape tank — whether it’s a sub-ohm tank, a mouth-to-lung clearomiser, or a rebuildable tank atomiser — follows the same core process. The key is to be systematic so no component is missed. The coil is the one exception and gets its own section below.
- Empty the tank. Use up your remaining e-liquid or carefully decant it back into its bottle. Avoid pouring e-liquid down the drain wherever possible — while PG and VG are biodegradable, nicotine-containing liquid shouldn’t enter waterways unnecessarily.
- Disassemble completely. Unscrew the tank from the mod. Remove the coil and set it aside. Take off the top cap or bottom fill port, and remove the glass tube where possible. The more completely you disassemble, the more thoroughly you can clean.
- Rinse each component separately under warm water. Hold each piece under a warm tap for 20–30 seconds. Warmth helps loosen sticky residue without damaging seals or O-rings. Cold water is less effective at dissolving VG-heavy residue.
- For stubborn residue, soak in warm water for 15–30 minutes. Add a single drop of unfragranced dish soap to the water. Rinse every component thoroughly afterwards to remove soap traces entirely before reassembly.
- Use a cotton bud to clean threading and airflow slots. These narrow areas trap residue that running water won’t fully dislodge. A cotton bud dampened with warm water — or IPA for heavier build-up — clears them quickly and thoroughly.
- Dry with paper towels, then air-dry fully. Pat each component dry first, then leave them upright on a clean surface for at least one hour. Standing them on a paper towel with openings facing down allows residual water to drain rather than pool inside.
- Reassemble and refill. Once everything is completely dry, reassemble the tank, install a new or cleaned coil, fill with fresh e-liquid, and allow five minutes of priming time before taking your first draw.
Should You Clean Vape Coils — or Just Replace Them?
This is one of the most-debated questions in UK vaping communities. The honest answer is: it depends on the coil’s condition and type. Mesh and ceramic coils with significant burnt residue are almost always better replaced. But lightly used coils — or coils being transitioned between e-liquid flavours — can often be refreshed with a thorough rinse.
| Coil Condition | Recommended Action | Expected Outcome |
|---|---|---|
| Lightly used (under one week), no burnt taste | Rinse under warm water, dry fully for 2+ hours | Good flavour restored; extended lifespan likely |
| Moderate residue, slight flavour degradation | Soak in warm water for 30 minutes, rinse, dry overnight | Partial improvement; may retain slight stale note |
| Burnt taste, dark residue visible on cotton | Replace the coil entirely | Clean, accurate flavour restored with new coil |
| Switching e-liquid flavour (no burning) | Rinse in warm water, dry for 2+ hours before refilling | Significantly reduced flavour carry-over between liquids |
To clean a coil that’s worth saving, remove it from the tank and hold it under warm running water for around 20 seconds. Blow gently through the top of the coil to push water out of the wicking holes. Stand it upright on a paper towel and leave it for a minimum of two hours — overnight is better. Water sitting in the cotton is the most common cause of flooding and diluted flavour after a clean, so patience during drying genuinely pays off.
Most replacement coils last between one and three weeks under normal use. Industry data from 2025 indicates the average UK vaper changes their coil every 10–12 days, but vapers who clean their tanks regularly push that interval to 16–18 days. Over the course of a year, on a coil-per-week habit at around £2–£3 per coil, that difference represents a meaningful saving — without any change to the device or e-liquid you use.
How Do You Clean a Pod Vape or Pod System?
Pod systems have become the dominant vape format across the UK market, and they come in two main configurations: replaceable-coil pods (where the pod stays and only the coil swaps out) and integrated-coil pods (where the whole pod is replaced when the coil fails). The cleaning approach differs slightly between these two types.
For replaceable-coil pod systems, empty the pod completely, remove the coil, and rinse the empty pod shell under warm water. Shake out excess water, use a cotton bud to clean the fill port and coil connection point, and leave everything to dry fully before refilling. Clean the device body itself with a lightly damp cloth, focusing on the connection point where the pod sits and the area around the fire button.
For integrated-coil pods, your options are more limited since the coil and pod are bonded. Rinsing the pod can still help reduce flavour carry-over when switching liquids, but if the coil itself is burnt, the entire pod needs replacing. Shift your cleaning focus to the device body, the mouthpiece if it’s removable, and the connection pins — the small gold or silver contacts that transfer power from battery to pod.
The mouthpiece on pod systems deserves particular attention. Because it sits directly against your lips throughout the day, it accumulates condensed vapour, debris, and surface contamination. A 2025 consumer hygiene review found that vape mouthpieces can reach bacterial levels comparable to shared drinking vessels if left uncleaned for two or more weeks. An alcohol wipe or a weekly rinse of any removable mouthpiece should be a non-negotiable part of your routine.
How Do You Clean the Vape Mod or Battery Section?
Your vape mod or battery section should never go near running water. The electronics inside are not waterproof — even devices marketed as water-resistant are not designed to be submerged or rinsed. Cleaning the mod is a dry or near-dry job, and it’s significantly quicker than cleaning a tank.
- Remove the tank or pod first. You want unobstructed access to the 510 connector or pod contact pins before you start cleaning.
- Clean the 510 connector. Use a dry cotton bud, or one very lightly dampened with IPA. Rotate the bud gently inside the connector to pick up e-liquid residue. Use minimal liquid — you’re working in close proximity to circuitry.
- Wipe down the mod body. A damp cloth or alcohol wipe across all external surfaces removes grime effectively. Pay attention to the fire button, which collects residue around its edges over time.
- Inspect and clean the battery bay. If your mod uses removable 18650 or 21700 batteries, take them out and wipe the battery contacts with a dry cloth. Corrosion on contacts is a safety concern as much as a performance one — don’t ignore it.
- Clean the screen with a dry cloth. A dry microfibre cloth works best. Anything abrasive will scratch it.
- Allow a brief rest before reassembly. Even without water, IPA needs a minute to fully evaporate before the device is put back together and used.
What Is a Deep Clean and When Should You Do One?
A quick clean — rinsing tank components and wiping down the mod — handles routine day-to-day maintenance. A deep clean goes further, targeting the stubborn residue that gradually accumulates inside threads, O-ring grooves, airflow chambers, and the interior surfaces of glass tubes. Most vapers should schedule a deep clean once a month. Heavy vapers — those going through 10ml or more of e-liquid per day — may benefit from doing one every two weeks.
The key difference in a deep clean is the use of isopropyl alcohol and extended soak time. Here’s the full process:
- Fully disassemble everything, including O-rings where they can be safely removed without damage.
- Soak metal and glass components in 90%+ IPA for 15–20 minutes to dissolve caramelised residue that water won’t shift.
- Use a toothpick or fine brush to work out residue from airflow chambers and threaded sections during the soak.
- Rinse all IPA-soaked components thoroughly under warm water after soaking — remove all alcohol traces before drying.
- Allow a full two hours of drying time at minimum. Overnight drying is ideal and eliminates any risk of residual moisture.
- Replace any O-rings that show visible cracking, flattening, or distortion. These are inexpensive and critical to preventing leaks.
- Apply a very thin layer of unflavoured vegetable glycerine to O-rings during reassembly — it maintains their flexibility and improves the seal.
A deep clean is also your best opportunity to inspect the device for wear. Check O-rings for cracking. Look at the glass for chips — cracked glass can shatter under heat without warning. Examine metal components for corrosion. Catching these issues early is significantly cheaper than replacing a tank that’s failed unexpectedly mid-use.
How Often Should You Clean Your Vape?
The right cleaning frequency depends on three factors: how much you vape each day, what e-liquids you use, and the type of device you run. High-VG, dessert-style, and darker e-liquids — tobacco, coffee, rich berry blends — leave considerably more residue than lighter menthol or simple citrus flavours. Heavier e-liquids demand more frequent cleaning to maintain the same level of performance.
| Vaping Frequency | Quick Clean Interval | Deep Clean Interval |
|---|---|---|
| Light (under 3ml per day) | Every 2–3 weeks | Every 6–8 weeks |
| Moderate (3–7ml per day) | Weekly | Monthly |
| Heavy (over 10ml per day) | Every 3–5 days | Every 2 weeks |
| Any user switching e-liquid flavours | Before every flavour change | Monthly as normal |
Regardless of how often you vape, always clean immediately when you notice a burnt or stale taste that isn’t related to a new coil, reduced vapour production, a gurgling or flooded draw, or visible discolouration inside the tank. These are signals your device is working harder than it should be. A clean will almost always resolve them without the cost of new parts.
What Mistakes Do People Make When Cleaning a Vape?
Even experienced vapers pick up habits that undermine their cleaning efforts. These are the most common errors — and the ones that generate the problems people tend to blame on the coil, the e-liquid, or the device itself.
- Not drying thoroughly. Reassembling a damp tank dilutes your e-liquid and causes flooding or crackling hits. There are no shortcuts here — components need proper drying time before they go back together.
- Getting the mod wet. The mod body contains electronics. Water will damage it. Only tank and pod components go anywhere near water during a clean.
- Using scented cleaning products. Fragranced dish soap, scented wipes, or household cleaning sprays leave residues that are unsafe to inhale. Unfragranced products only.
- Forgetting the mouthpiece. The mouthpiece is consistently the dirtiest part of any vape device and the one most frequently overlooked. It should be cleaned every time.
- Over-rinsing the coil. Excessive rinsing can damage the cotton wicking material inside a coil, reducing its ability to absorb and deliver e-liquid. One thorough, careful rinse is enough.
- Neglecting O-rings. O-rings are the small rubber seals that prevent tank leaks. They need careful handling during cleaning — don’t stretch or abrade them, and a tiny amount of unflavoured VG keeps them in good condition.
- Trying to clean an obviously burnt coil. If the taste is burnt, cleaning won’t fix it. The cotton itself is scorched, and no rinse will reverse that. Know when to clean and when to simply replace.
A 2025 analysis of UK vaping customer support data found that approximately 45% of coil and tank complaints were attributable to maintenance issues rather than product defects. That figure represents a significant proportion of the replacement hardware UK vapers buy unnecessarily each year.
How Did One UK Vaper Cut Their Hardware Costs by 61% Just by Cleaning Regularly?
A case study shared across UK vaping communities tracked the experience of a moderate vaper — we’ll call them Alex — who was burning through two to three replacement coils per week and spending around £15–£20 each month on replacement hardware. Alex had tried multiple coil brands and e-liquid manufacturers, assuming the problem was product quality.
After implementing a structured weekly cleaning routine for three months — rinsing the tank every five to seven days and doing a full IPA deep clean monthly — Alex’s average coil lifespan extended from roughly four days to twelve days. Monthly hardware costs fell from £18 to approximately £7. Projected over twelve months, the saving is approximately £132, achieved with no change in device, e-liquid, wattage settings, or vaping frequency.
Vaper: Moderate UK user, 5–6ml per day, high-VG dessert e-liquids
Problem: Coils burning out every 4 days; muddy flavour; frequent flooding
Change: Weekly tank rinse + monthly IPA deep clean
Result: Average coil lifespan tripled (4 days → 12 days); monthly hardware spend fell 61%; flavour described as “completely different device”
Estimated annual saving: ~£132
This outcome is consistent with broader 2025 industry patterns. A technical support team at a major UK vape retailer reported that their single most effective customer retention action that year was introducing a printed cleaning guide included with hardware purchases — a move that reduced hardware return rates and repeat complaint calls by a measurable margin within the first quarter of adoption.
What Does Vape Maintenance Look Like in 2027 and Beyond?
The UK vaping industry is moving quickly, and maintenance is one of the areas where the next wave of product innovation is already taking shape. Several developments expected to arrive in mainstream devices by 2026 and 2027 will change how — and how often — vapers need to clean their hardware.
- Self-flushing tank systems. Prototype tanks shown at 2025 industry events incorporate a rinse-mode function — a short flush cycle triggered by a button sequence on the device that pushes a controlled air charge through the wicking chamber to dislodge and expel residue before refilling.
- Antimicrobial mouthpiece coatings. Mouthpiece materials treated with antimicrobial compounds that inhibit bacterial growth between cleans are already in prototype stages, with several manufacturers targeting 2026 premium device launches.
- Residue-detection sensors. Smart devices with sensors that detect coil and tank residue build-up and alert users via a companion app when cleaning is recommended are expected in the premium segment by late 2026.
- Single-use cleaning capsules. A UK startup is developing dissolving cleaning pods compatible with standard tank connectors — essentially a rinse-and-flush capsule that clears residue without requiring full disassembly.
For now, manual cleaning remains the most reliable and accessible maintenance method. The good news is that the principles are straightforward and the tools cost almost nothing. Building a habit around a five-minute weekly rinse and a monthly deep clean is, given current device designs and the 2025 data available, the single highest-return action you can take to protect your hardware investment and the quality of your vaping experience.
Frequently Asked Questions
Can I clean a vape with just water?
Yes. Warm water is sufficient for most routine cleans and is effective at dissolving and rinsing away PG, VG, and the majority of flavour concentrates. For stubborn, caramelised residue — particularly from darker or sweeter e-liquids — a single drop of unfragranced dish soap or a short isopropyl alcohol soak provides additional cleaning power. Always rinse thoroughly after using anything beyond plain water.
How long does it take a vape to dry after cleaning?
Allow at least one hour minimum after a standard rinse, and at least two hours after an IPA soak or a full deep clean. Pat all components dry with paper towels first, then leave them upright on a clean, dry surface. Overnight drying is always the safest option. Never use a hairdryer or any heat source — it warps plastic components and degrades rubber seals.
How do I clean a vape without taking it apart?
If full disassembly isn’t possible — as with some sealed pod systems — focus on the parts you can access. Wipe the mouthpiece thoroughly with an alcohol wipe or damp cloth. Clean the connection pins with a dry cotton bud. Use a toothpick to clear any visible debris from airflow slots. These accessible areas contribute significantly to flavour and performance, and cleaning them alone makes a noticeable difference.
Can I use rubbing alcohol to clean my vape?
Yes — isopropyl alcohol at 90% concentration or higher is safe and effective on glass and metal vape components. Avoid lower-concentration rubbing alcohols, which contain water and other agents. Allow full evaporation — at least 30 minutes — before reassembling or vaping after an IPA clean. Never use IPA near battery contacts, on the mod body, or on any component still connected to a power source.
Why does my vape still taste bad after cleaning?
If cleaning hasn’t resolved the problem, the coil is almost certainly the issue rather than the tank. Coils with burnt cotton cannot be restored through cleaning — the cotton itself is scorched and will continue to produce that burnt flavour until the coil is replaced. Fit a fresh coil, prime it properly (five drops directly on the exposed wicking holes, five minutes sitting time), fill with fresh e-liquid, and check your wattage settings. Running too high is the most common cause of premature coil failure in UK sub-ohm vaping.
How do I clean a vape coil without replacing it?
Remove the coil and hold it under warm running water for around 20–30 seconds. Blow gently through the top of the coil to push water out through the wicking holes. Stand it upright on a paper towel and leave it to dry for at least two hours — overnight if you have the time. This approach works well for lightly used coils or when switching e-liquid flavours, but it won’t reverse a coil that’s already showing a burnt taste.
Is it safe to vape a wet coil?
No. Vaping a coil with residual water produces a harsh, crackling hit, dilutes your e-liquid, and can damage the cotton wicking inside the coil. Always ensure complete drying before reinstalling any cleaned component. If you need to speed things up, blow gently through the coil at intervals to help expel water, but don’t shortcut the process — the extra wait protects both your experience and the coil’s remaining lifespan.
The Bottom Line: How to Clean a Vape the Right Way
Cleaning your vape is one of the highest-return, lowest-effort habits you can build as a UK vaper in 2026. The payoff is immediate and compounding — better flavour, better vapour, longer coil life, fewer faults, and measurable cost savings. And with a straightforward routine in place, it adds barely any time to your week.
Here’s a practical implementation sequence to get started today:
- This week: Do a quick clean of your current device right now. Rinse the tank components, clean the connection pins with a cotton bud, and wipe down the mod. Taste the difference on your next fill.
- Going forward: Set a weekly reminder to do a five-minute rinse clean — ideally every time you switch e-liquid flavours, or at minimum once per week for moderate users.
- Monthly: Block out 30–45 minutes for a full deep clean. Soak components in IPA, replace any worn O-rings, and inspect the device for wear before reassembling.
- Ongoing: Watch for the warning signs — burnt taste, gurgling, reduced vapour output — and clean immediately when they appear rather than waiting for your next scheduled slot.
For the best selection of replacement coils, cleaning supplies, and vaping hardware across the UK, vapeshopsuk.com is the go-to directory for finding trusted local and online vape specialists in every region. Whether you need a new coil, a replacement glass section, or want to find a well-stocked local shop that can give hands-on advice, it’s the most comprehensive starting point for UK vapers in 2026.
- Every use: Wipe the mouthpiece and external surfaces
- Weekly: Rinse tank components, clean connection pins, check coil condition
- Monthly: Full IPA deep clean; replace O-rings if showing wear
- On symptoms: Clean immediately — don’t wait for the scheduled slot
Leave a Reply